Guide to Surface Finishing for 3D-Printed Parts
February 9, 2018 | Stephen Sharretts | Share

3D printing is a useful new technology that allows manufacturers to produce components relatively quickly, in small batches and with a high degree of flexibility. Often, though, after a part comes out of the printer, it needs to undergo a surface finishing process before it’s ready for use, especially if it’s a consumer good or a plastic piece you will use in harsh conditions.
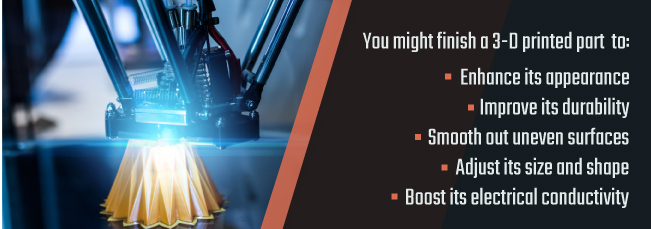
You might choose to finish a 3D-printed part for many of the same reasons you would apply finishing processes to a product produced with injection molding or another manufacturing technology. You might finish it to:
- Enhance its appearance
- Improve its durability by increasing its resistance to wear, corrosion, heat or other elements
- Smooth out uneven surfaces
- Adjust its size and shape
- Boost its electrical conductivity
These are just a few of the ways surface finishing can be useful. While many of the same reasons for employing a surface finish apply to both 3D-printed parts and parts produced with more traditional methods, you should always consider the unique features of your part when choosing surface finishing processes to use. The manufacturing process you use will impact these features, which can include:
- The material your component is made of
- The shape of the part
- Its thickness
- Its weight
- Its intended function and the environment it will be exposed to when in use
In fact, surface finishing 3D-printed parts should be a part of your design process far before you ever have a finished product, as that step can be integral to product functionality. Here are some of the surface finishing processes you should consider when producing parts using 3D printing technology.
3D Printing Finishing Options: Plating
Plating involves covering a plastic or metal substrate with a coat of metal by subjecting the materials to either an electric current or a chemical solution.
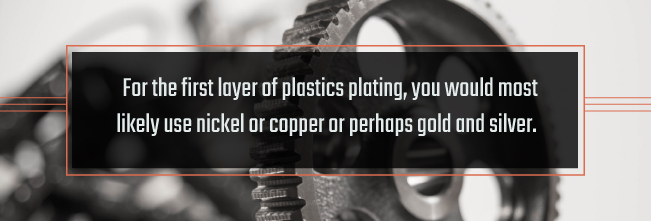
The kinds of metal used for plating vary. For the first layer of plastics plating, you would most likely use nickel or copper or perhaps gold and silver. After that, you can apply virtually any metal, including:
- Platinum
- Chrome
- Tin
- Palladium
- Rhodium
The best metal for your project depends on which features you want to improve or add to your printed component.
Plating, whichever method or metal you use, has various benefits when used with 3D-printed parts. Many components produced via this technique are made of plastic, which has its advantages but leaves the part susceptible to damage from impact, wear and other external factors. A metal coating can increase its strength and durability by providing a protective outer layer.
You might plate a metal component to increase resistance to corrosion, oxidation, wear and other elements as well as to improve strength. This finishing technique can also improve the appearance of a printed component. The item might come out of the printer with uneven coloration or slightly uneven surface.
Covering the substrate with a smooth, gleaming metal surface adds a touch of sophistication and sleekness. A layer of metal can also introduce new properties to your part, such as electrical conductivity and heat transfer properties.
3D Printing Finishing Options: Sanding
Sanding is a surface finishing technique that is familiar to many. As you likely know, it involves using a rough material such as sandpaper to smooth out and remove small imperfections from a surface.
When you may remove some 3D-printed objects from the printer, you can see thin lines where each new layer begins. This might not matter for some industrial components, but for consumer goods, prototypes and other items that will be on display, you want your product to be as aesthetically appealing as possible. Sanding removes imperfections and gives you an even surface.
Sanding comes in handy if you plan to apply any sort of coat to the surface because it’ll need to be smooth so that coating comes out evenly. While sanding is effective, one downside is it can be time consuming, especially if done by hand. It can also be difficult to reach some spots, especially small holes and undercuts.
3D Printing Finishing Options: Bead Blasting
For those hard-to-reach spots, bead blasting is more efficient. In this method, you use a spray gun to shoot finely reground thermoplastics at the surface, blasting away imperfections and smoothing out the surface in a similar fashion to that of sanding. Bead blasting, however, can be done in much less time and can reach the insides of channels and other tricky spots.
As with sanding, bead blasting is useful for improving the aesthetics of a product. It will result in a smooth matte surface. It’s also an efficient way to smooth out a material before applying a coating so it adheres correctly.
If using bead blasting, be sure to start out at a low pressure and gradually increase it if needed as not to linger too long on any one area. A pressure that’s too high or staying on one spot for too long can blast away too much of your part and create small divots.
3D Printing Finishing Options: Shot Peening
Shot peening is a similar process to bead blasting but is used with a different goal in mind. Rather than removing imperfections or unwanted imperfections from the surface of your object, this technique is mainly used to increase the strength and durability of a component.
In the shot peening process, pressurized air shoots tiny metal or plastic beads at a surface at high speeds, similar to bead blasting. These particles create small dimples on the object’s surface under which compression stresses form, and as the beads bombard the component, the dimples begin to overlap.
The compressive stress, the kind of stress that reduces the length of an object, replaces the tensile stress in the item, which increases length. The compression stress makes the surface stronger and helps it resist fatigue, wear, cracking and erosion from cavitation.
3D Printing Finishing Options: Heat Treatments
3D-printed objects, whether metal or plastic, may also undergo one of several various types of heat treatments as part of the finishing process. Like shot peening, heat treatments strengthen a material by reducing tensile pressure. It evens out the high and low stress areas of an object, helping to prevent failures. You might also use heat treatment to increase density or help form the item into the final desired shape.
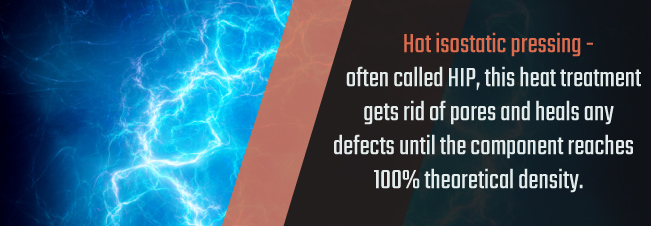
After the more standard heat treatments, which relieve stresses and increase strength, some objects must undergo hot isostatic pressing. Often called HIP, this heat treatment gets rid of pores and heals any defects until the component reaches 100 percent theoretical density. This step is crucial if the component will be subjected to certain harsh conditions or a fatigue failure could have severe consequences. This applies to components that will be used in sectors such as:
- Aerospace
- Marine
- Medical
- Power generation
Initial heat treatment typically takes place in a vacuum furnace, while HIP typically occurs in a pressure vessel. Some equipment, though, can perform both functions and also apply rapid cooling.
3D Printing Finishing Options: Vibratory Systems
You can use vibratory systems to process and polish multiple 3D-printed objects at once. To use this method, you place the objects to be polished in a unit that contains a ground-up material that is softer than the 3D-printed part. Often, this material is ceramic, plastic, corn cob or a synthetic medium. The vibratory unit is typically tub- or bowl-shaped and can come in a range of sizes. The unit pulsates until the medium polishes the components by repeatedly impacting it.
This technique is most often used for metal components because the polishing medium must be softer than the component, but you can also use it to polish various types of strong plastics. A major advantage is that you can finish multiple objects at once with minimal manual effort.
One of the drawbacks is this method can damage uneven edges and corners on your object. Because of this, it’s mostly applied to round products or those with rounded edges. This process also isn’t as precise as some others and finishes the entire surface at once.
3D Printing Finishing Options: Tumbling
Tumbling is similar to vibration, but it rotates the components and the polishing medium around in a drum rather than vibrating them. This is a gentler movement, which makes tumbling better for more delicate parts and those with fine details. The unit used is often called a centrifugal barrel system.
The same polishing materials work for tumbling as vibratory systems — ceramic, plastic, corn cob and synthetic mediums. As with vibration, you can also finish multiple parts at once. You have to be careful, however, about mixing different types of media, because some combinations cause an imbalance and result in uneven finishing or damage to parts.
3D Printing Finishing Options: Vapor Smoothing
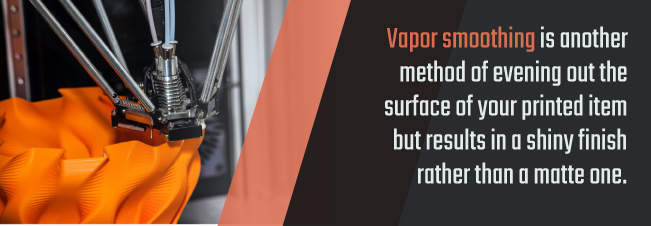
Vapor smoothing is another method of evening out the surface of your printed item but results in a shiny finish rather than a matte one. This sheen can be removed, though, if desired with bead blasting or sanding.
The vapor smoothing process uses a solvent to melt the surface of your component. After placing your product in a vapor chamber where you expose it to the solvent, you immediately put it in cooling chamber to stop the liquefaction. This cooling ensures only the surface melts and the object’s shape is maintained.
This process also fills any pores in the item’s exterior and seals the surface, which makes it especially useful on items intended to hold liquids or gases. You can’t use vapor smoothing on every type of material, as it will cause a damaging chemical reaction in some, including polycarbonate, polyphenylsulfone (PPSF), ULTEM 1010 and ULTEM 9085. You’ll also, of course, need a chamber that fits your object, which can be restrictive if printing especially large components.
3D Printing Finishing Options: Solvent Dipping
An alternative to vapor smoothing is solvent dipping, which, as the names suggests, calls for dipping the component into a solvent rather exposing it to a vaporized solvent. This method can be useful if the component is larger than the size of the vapor chamber.
The results are quite similar to those of vapor smoothing, but it is more difficult to maintain dimensional accuracy because the solvent acts more quickly and aggressively.
3D Printing Finishing Options: Epoxy Coating
Using a solvent isn’t the only method for sealing a component’s surface during 3D print finishing processes. You can also apply an epoxy coating to the surface of your object to create an airtight seal around it that can also increase resistance to high temperatures and various chemicals. This approach is ideal for components that will face harsh operating conditions.
Epoxy coating is typically applied by hand. While this reduces costs, because you don’t have to purchase expensive equipment, it increases the time and labor needed to apply it and makes it more suitable for short production runs, small components or items that only require a portion of their surface sealed. You also can not access certain areas, such as internal channels and undercuts. It also might not be ideal for parts that require highly precise dimensions, as the epoxy coating will add a small amount of thickness to the part.
3D Printing Finishing Options: Epoxy Infiltration
Another method of applying epoxy, however, is available that counters many of the limitations of applying epoxy by hand. In epoxy infiltration, you immerse your product in an epoxy resin and use a vacuum chamber to draw the resin into the component, allowing it to fill in any pores.
The seal created through epoxy infiltration is airtight and watertight as well as resistant to high temperatures and many chemicals. The process takes about three hours to complete and requires less manual labor, meaning it’s more practical for large components and large quantities of components than applying epoxy by hand. You can also avoid significant changes in dimensions if the process is executed with precision.
The main disadvantage of epoxy infiltration as compared to applying a coating by hand is its higher cost. You need a vacuum chamber, an oven to pre-heat and cure the resin, and the cost of the epoxy resin is higher as well.
3D Printing Finishing Options: Painting
Another familiar finishing technique is painting, which enhances aesthetic appeal and also has some sealing attributes, although it won’t be airtight and resistant to high temperatures and chemicals like more robust sealing methods are. While the methods and outcomes of applying paint to a 3D-printed vary widely depending on its intended use, the main motivation behind painting a product is typically an aesthetic one.
Often, before you add paint, the object will likely have undergone various other processes to smooth, seal or otherwise finish it. Before you paint, you may want to apply a primer and fill any pores with body putty, which must then be sanded down to make the surface smooth again. Then, you might put on another coat of primer before applying one or more layers of paint and, finally, a clear coat to protect the paint.
Learn More About Plating for 3D-Printed Parts
While 3D printing is a groundbreaking and quite useful process, it typically isn’t the last step in producing a component. After the product comes out of the printer, you will often apply one or more surface finishing techniques.
Of all the finishing methods available, plating provides the most wide-ranging benefits. It can enhance aesthetic appeal, strength, durability and resistance to various external factors as well as add assorted capabilities such as electrical conductivity. It’s also versatile, as you can use various types of metals depending on your desired outcomes and choose between several plating methods.
While each surface finishing technique has its unique benefits, plating should be one of the first you consider for your 3D-printed components. To learn more about our plating services, feel to browse the resources available on our website. You can also request a free quote by filling out this short form today. Once you submit the form, a representative will contact you within one business day.
Resources & Insights
Related posts
Explore articles similar to this one
Sharretts Plating Announces Strategic Expansion to Advance Wafer-Level Metallization Capabilities
York, Pennsylvania — April 13th, 2026 — Sharretts Plating Company (SPC), a leader in advanced metal finishing and engineered surface…
Learn more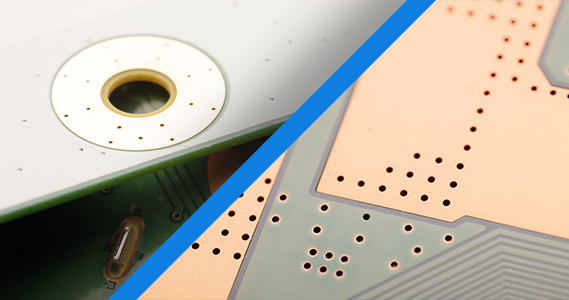
What Is the Difference Between OSP and ENIG? A Complete PCB Finish Comparison
The surface finish selected for printed circuit board (PCB) fabrication is a critical determinant of manufacturing yield, solder joint reliability, shelf life…
Learn more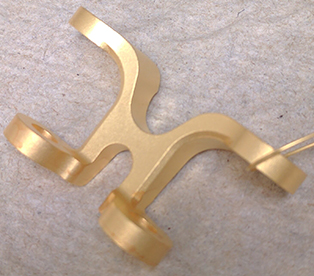
Gold Plating Standards
Gold is known for its glitter and glamour, but it also has significant value from an electroplating perspective. Why should…
Learn moreStay in touch
